
Appearance
Server setup
This article describes how to set up and prepare the customer server for deployment.
Prepare the bootable USB drive
Prerequisites
Complete the following prerequisites:
Verify that your USB drive has a capacity of at least 4 GB.
Back up any data you have on the USB drive.
(As applicable) Verify that the Ubuntu version installed on your USB drive is currently supported.
💡 This prerequisite applies when you are using a previously prepared drive.
Create a Bootable USB Drive
There are multiple options for Windows (balenaEtcher, Rufus) and Linux (Startup Disk Creator for Ubuntu).
Here is the example on how to use balenaEtcher:
Launch the downloaded file.
Use the wizard to install the application.
The installation completes, and the application launches automatically.
Insert the prepared USB drive into your computer.
Click Flash from URL, then enter the following URL:
https://releases.ubuntu.com/22.04.4/ubuntu-22.04.4-live-server-amd64.isoClick Select target.
Select the prepared USB drive, and click Select.
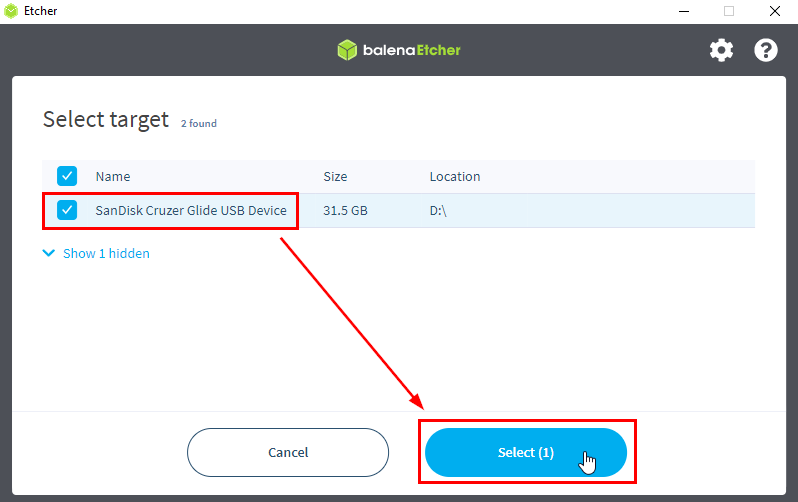
Click Flash!
Wait until the Flashing and Validating processes are complete.
Your bootable USB drive is ready to use.
Ubuntu installation
Video Vision software runs on Ubuntu. This article explains how to install Ubuntu on the customer server.
Boot from the flash drive
Boot the server with the prepared Ubuntu USB drive to start the installation process. How to trigger boot process depends on the motherboard used in the server.
Here are the example for HP server:
Connect the Ubuntu USB drive to the server.
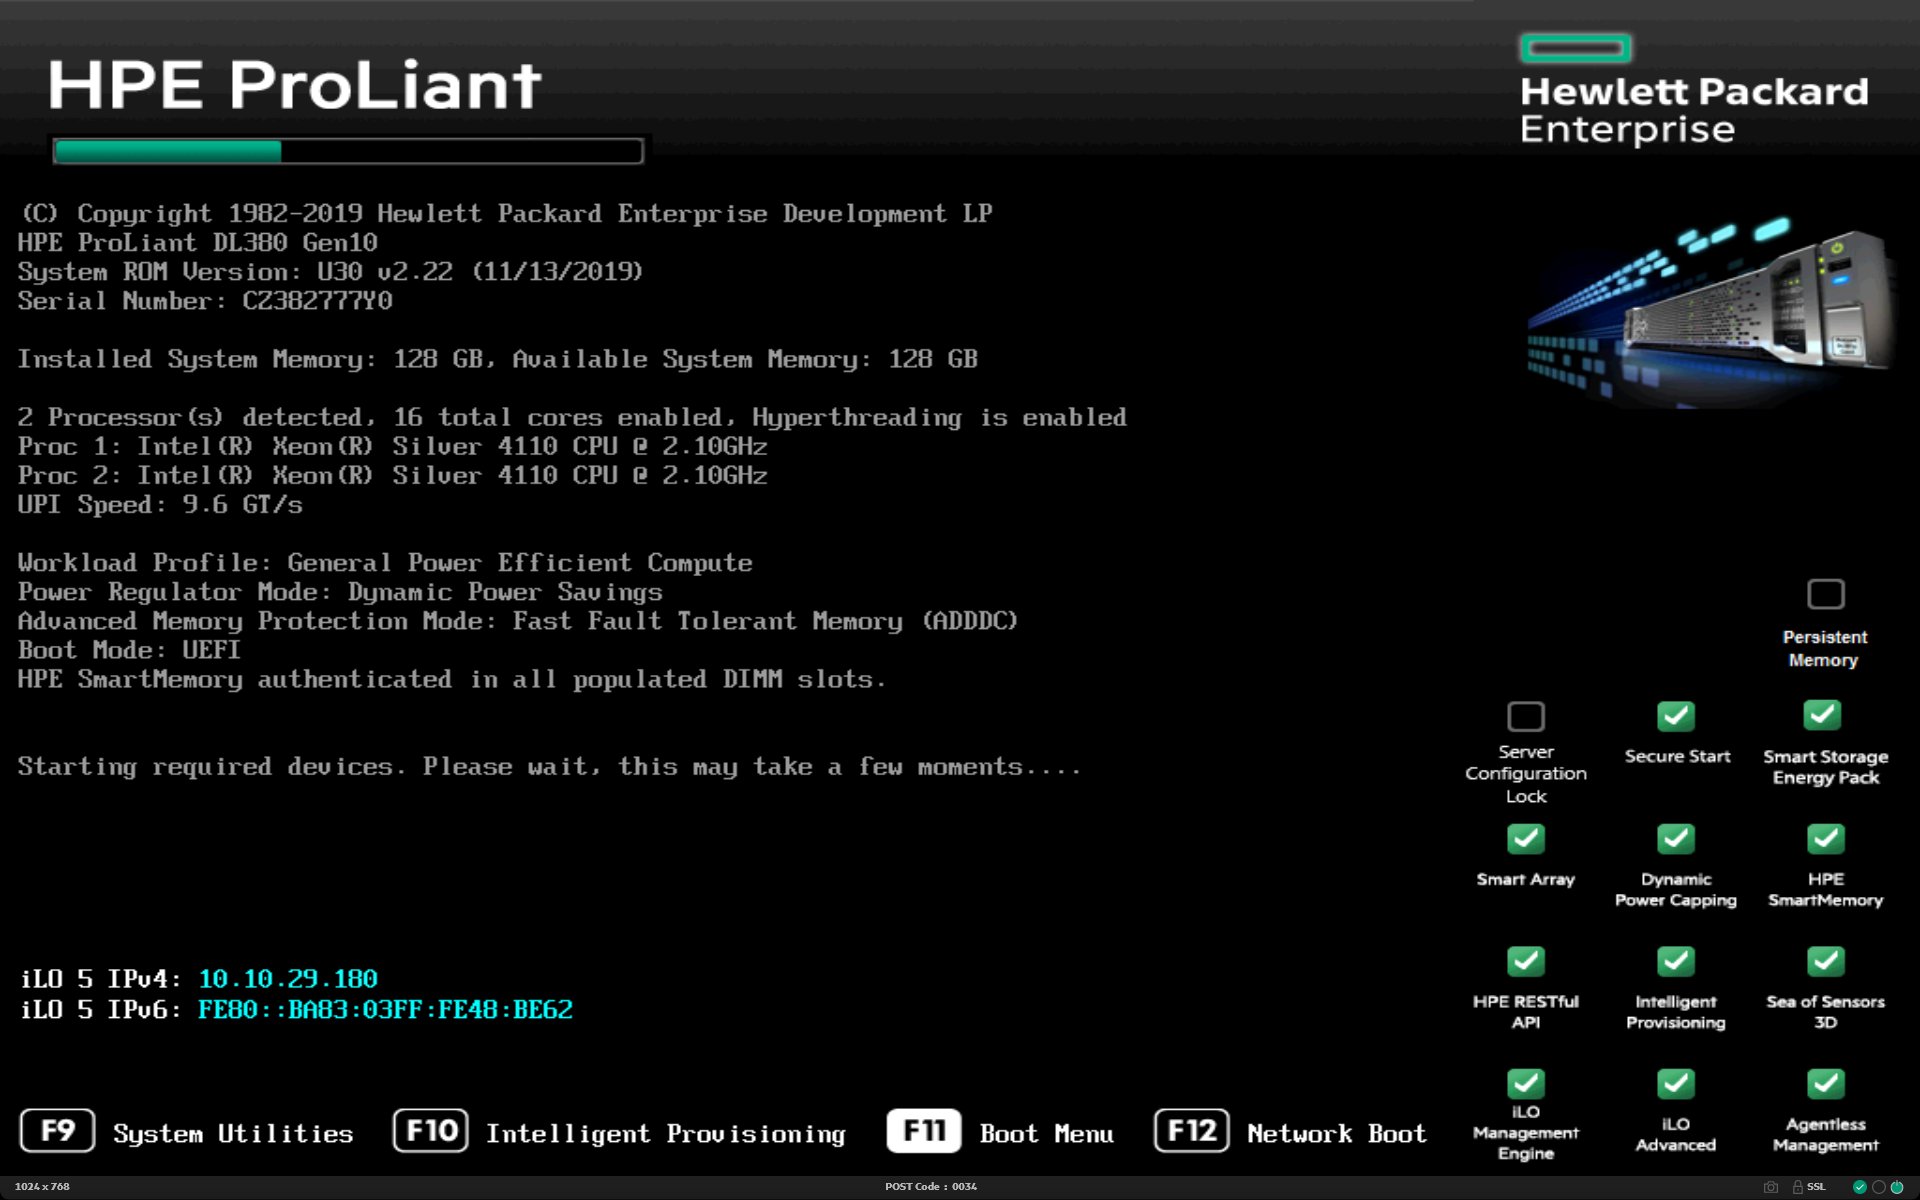
Turn on the server, wait for the boot screen to appear, and then press F11 on your keyboard.
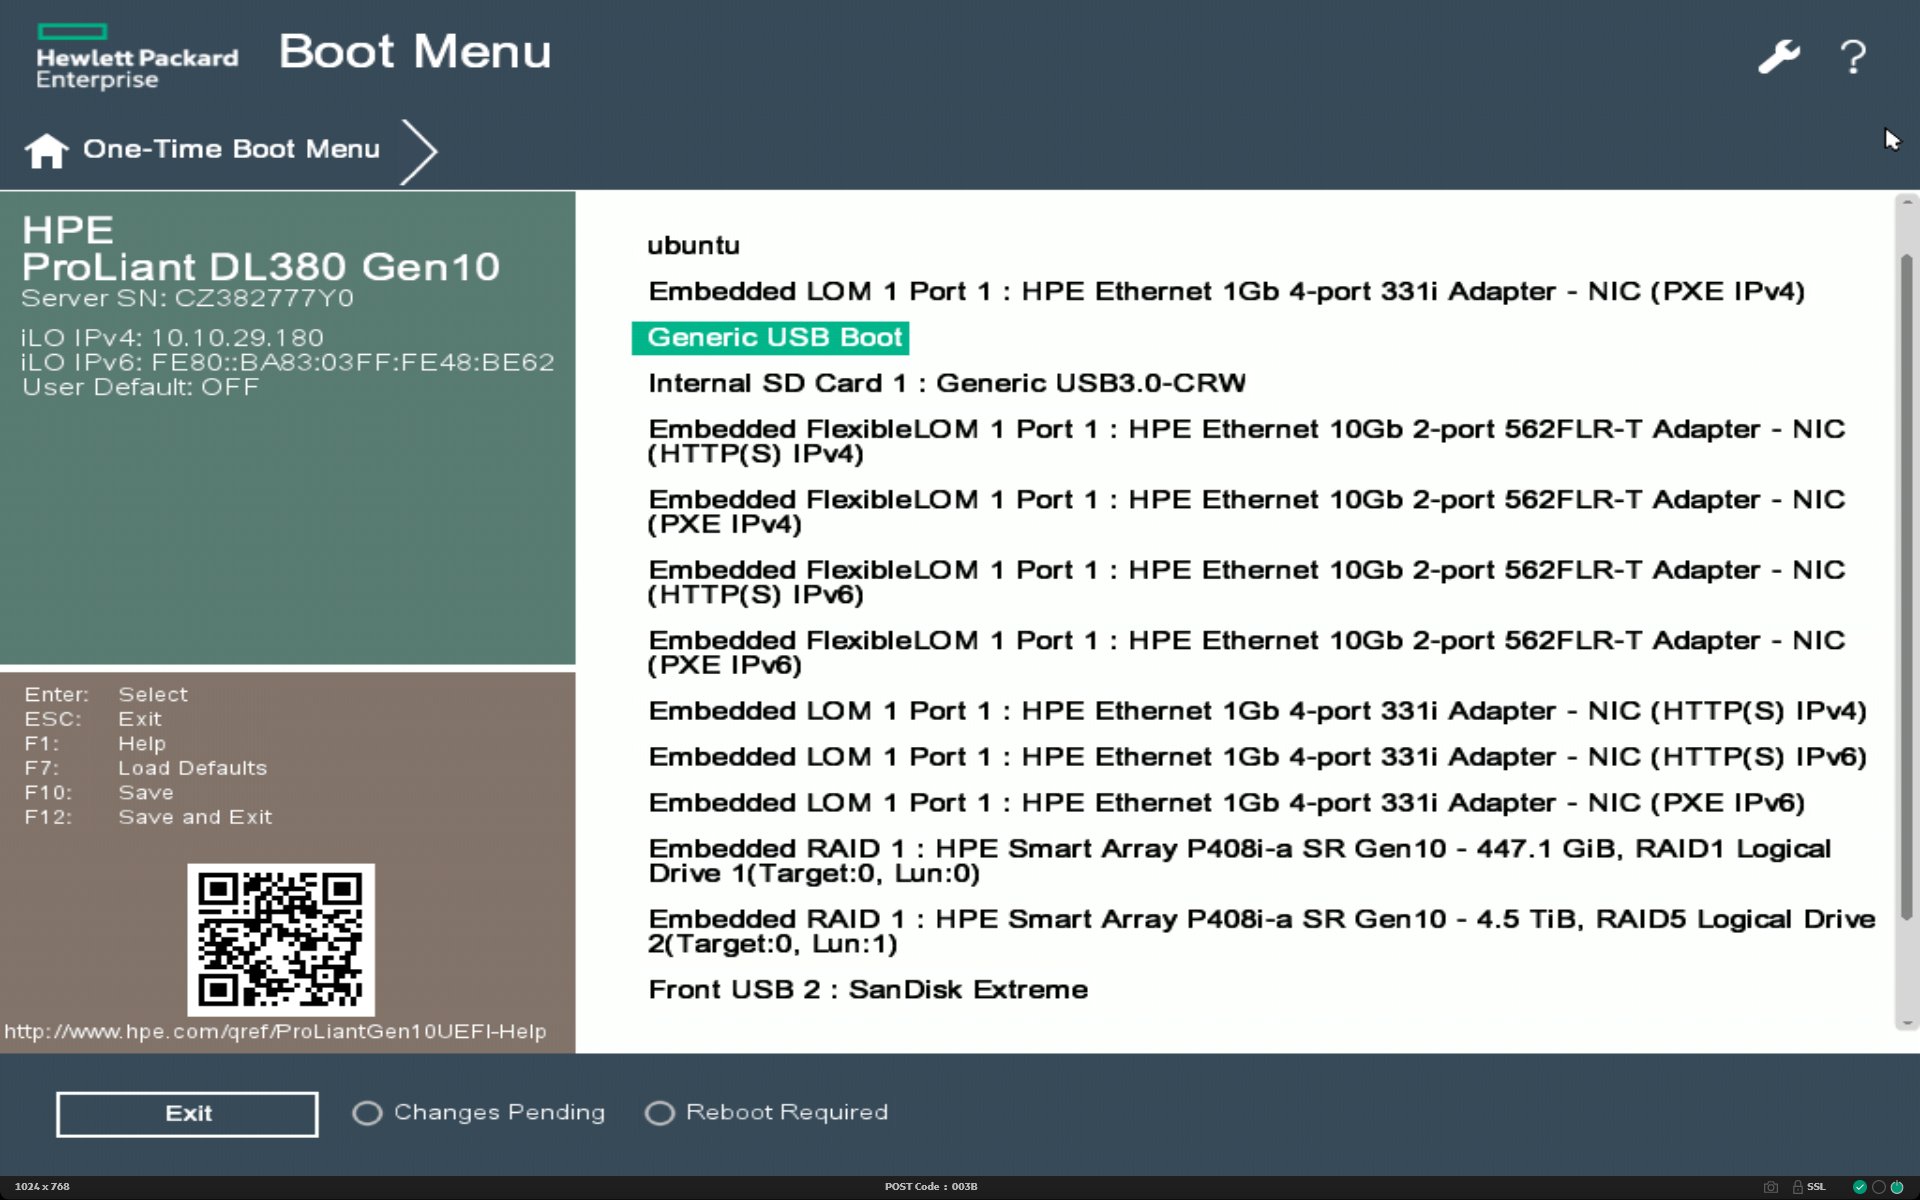
Select Generic USB Boot and press Enter.
The selection screen appears, and the installation begins.
Complete the Ubuntu installation
You can install the Video Vision software only after you complete the Ubuntu installation.
💡 Use the ↑ and ↓ keys on your keyboard to make selections.
Follow these steps:
Select English, then press Enter.
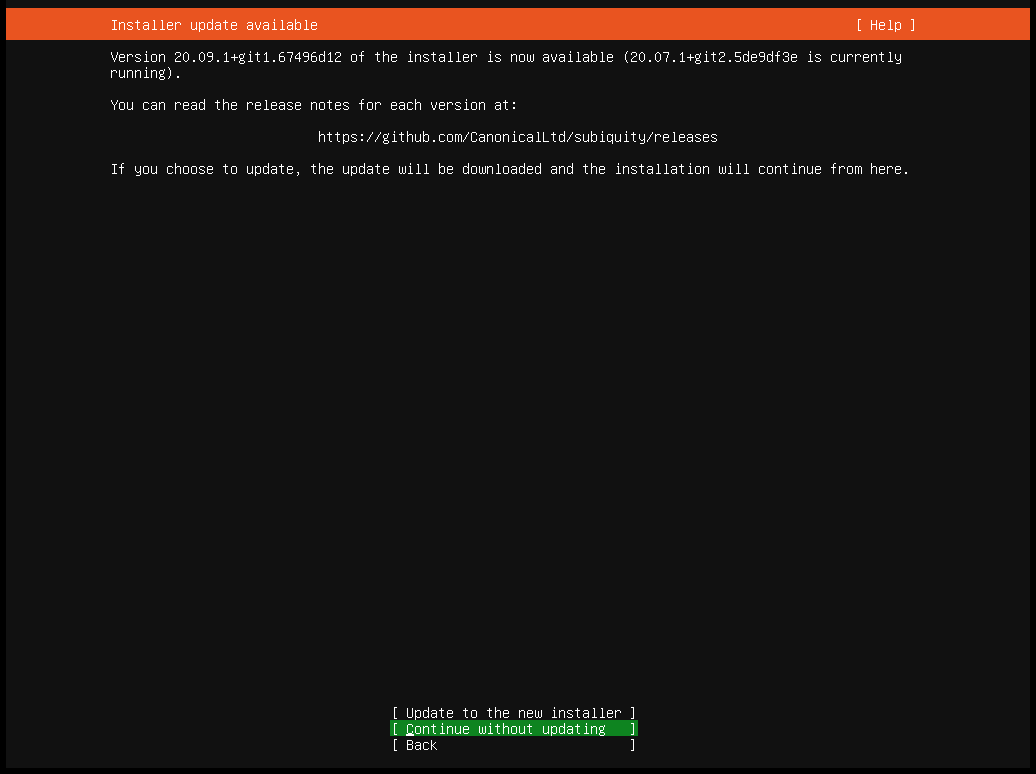
(As applicable) Select Continue without updating and press Enter.
💡 This step applies when your version of the installer is outdated. Otherwise, the request does not appear.
Select your preferred keyboard settings, and then select Done.
Select Ubuntu Server as installation type
The device automatically detects and configures the network connection. Wait until a network is detected, then select Done.
❌ Do not proceed with the installation until a network has been detected.
Proxy configuration:
Most of the time this can be skipped. But if your current network requires proxy server to be used here is the guide:
(As applicable) Specify the proxy information in the following format:
htmlhttp://<username >:<password >@<hostname>:<port-number>/</port-number></hostname></password ></username >username
(As required) Defines the user ID. This parameter is required if your proxy is protected by user credentials.password
(As required) The password that corresponds with username.hostname/port
The IP address/hostname and port of the proxy.
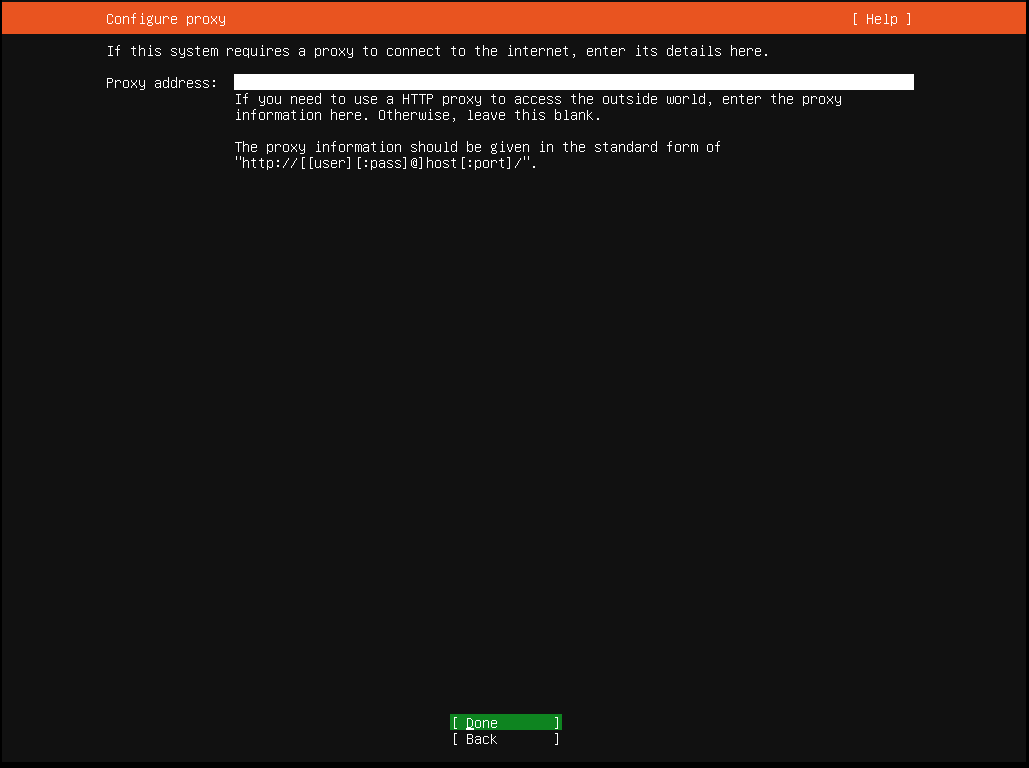
Select Done.
Keep the default mirror address and select Done.
Storage configuration part 1:
- Use an entire disk
- Set up disk as an LVM group
- Done
Storage configuration part 2: Default ubuntu setting for new logical volume is to set it to 100GB even if the size of the disk is larger. We need to adjust it:
- With arrows, move up to ubuntu-lv line which says 100.000G
- Press Enter, then select Edit
- In Size field, add some more zeroes so number is larger as disk size. For example 100000.000G. Once you move away from the Size field, it will automatically adjust to full disk size.
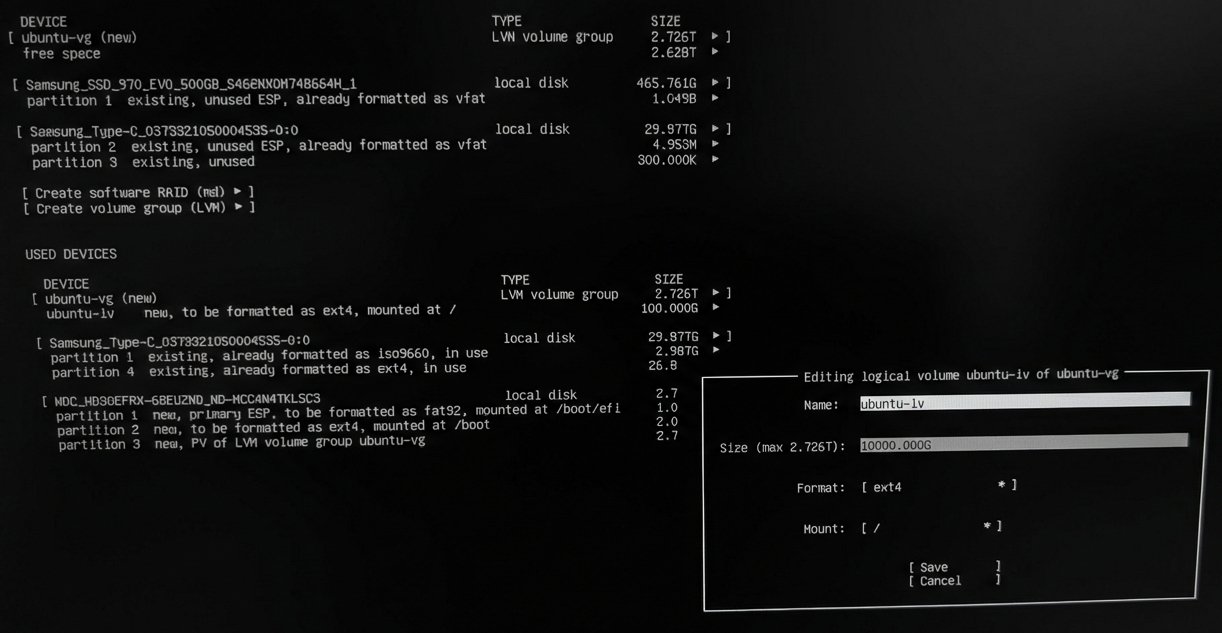
- Make sure
Formatis set toext4. - Move down to Save and press Enter
- In Size field, add some more zeroes so number is larger as disk size. For example 100000.000G. Once you move away from the Size field, it will automatically adjust to full disk size.
- Once the ubuntu-lv line says it uses the whole disk, move down and press Done
Confirmation dialog pops-up saying that action is destructive and it will delete all existing data on the disk. Select Continue if you are OK with that.
Specify the requested information as illustrated in the following example:
Your name: vasadmin
Your server’s name:
For the server name, follow the FORXAI Project naming scheme: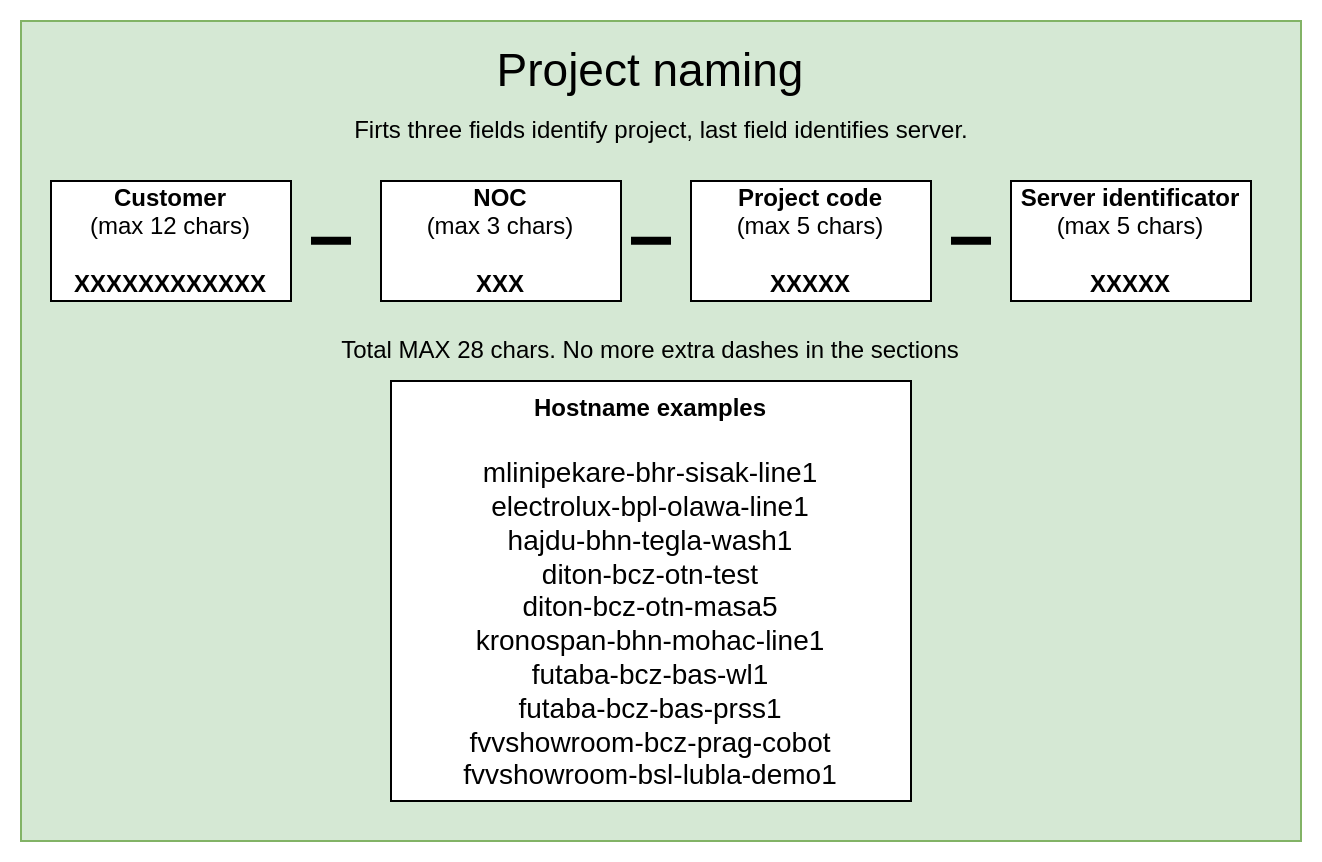
Pick a username: vasadmin
Choose a password: vasadmin
Confirm your password: Re-enter the password.Select Done.
Upgrade Ubuntu page:
- Select ** Skip for now** and press Continue
Select Install OpenSSH server by pressing space bar , and then select Done.
Keep the default server snap selections, and then select Done.
Wait for the installation and any updates to be completed.
Remove the USB drive from the server.
Select Reboot Now.
The server reboots, and the Ubuntu installation is complete.