Appearance
Datasets
Datasets provide a storage location where users can upload and manage collections of images and annotations. These datasets can serve various functionalities within the system, such as providing image feeds to virtual camera devices or training your own AI for computer vision.
Managing Datasets
Datasets can be managed through standard CRUD operations available on the "/hub/datasets" page of your server.
💡 Tip
Note that your server address may vary based on your configuration.
Dataset lock
Dataset locks are a crucial mechanism that prevent data inconsistency when the dataset is actively used by system components. The most common scenario for dataset locking is when a virtual camera is using the dataset as its image feed source but locking can happen during other operations. The system communicates the dataset lock status on the UI (The locked banner is not real-time updated. User needs to refresh the page to see the latest status).
During the lock period:
- The dataset cannot be deleted
- Images within the dataset cannot be added, modified, or deleted
- Annotations cannot be modified
- Image renaming operations are blocked
These restrictions ensure that virtual cameras have consistent access to their image feed source. Any modifications to the dataset during active virtual camera operations could lead to:
- Missing or corrupted image frames
- Inconsistent annotation data
- Virtual camera malfunctions
The locks are automatically released when:
- Virtual camera is stopped
- Processing operation is completed
- System component releases the lock
⚠️ Warning
Attempting to modify a locked dataset will result in an error message. You must first stop any active virtual cameras or processes using the dataset before making modifications.
Create a Dataset
To create a new, empty dataset:
- Navigate to the Datasets section from the Hub application menu.
- Click the Create Dataset button.
- Enter a unique and valid name and optionally provide a description.
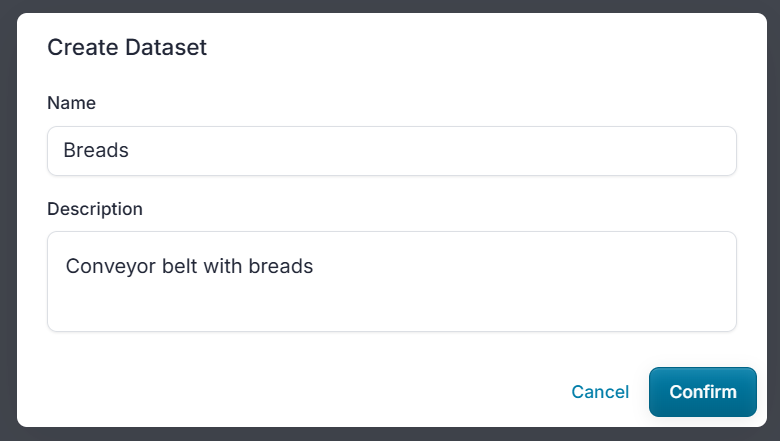
- Click Confirm
After creation, you will be redirected automatically to the dataset detail page.
Browse Datasets
List All Datasets: Navigate to the Datasets section to view a list of all existing datasets.
Filter and sort datasets: Search your Datasets by using keywords or sort them by various options.
View Specific Dataset: Click on the dataset name to view detailed information, including the dataset description and contents.
Update a Dataset
To update a dataset’s name or description:
- Click the ... (three dots) icon on the dataset detail page to open menu and select Edit.
- Modify the dataset name or description as needed.
- Click Confirm.
Delete a Dataset
You can delete datasets under the following conditions:
Empty Dataset:
- Click the ... (three dots) icon on the dataset detail page to open menu and select Delete. The dataset will be deleted immediately without confirmation.
Non-empty Dataset:
- Follow the same steps as above. A confirmation dialog will appear, requiring you to confirm the deletion.
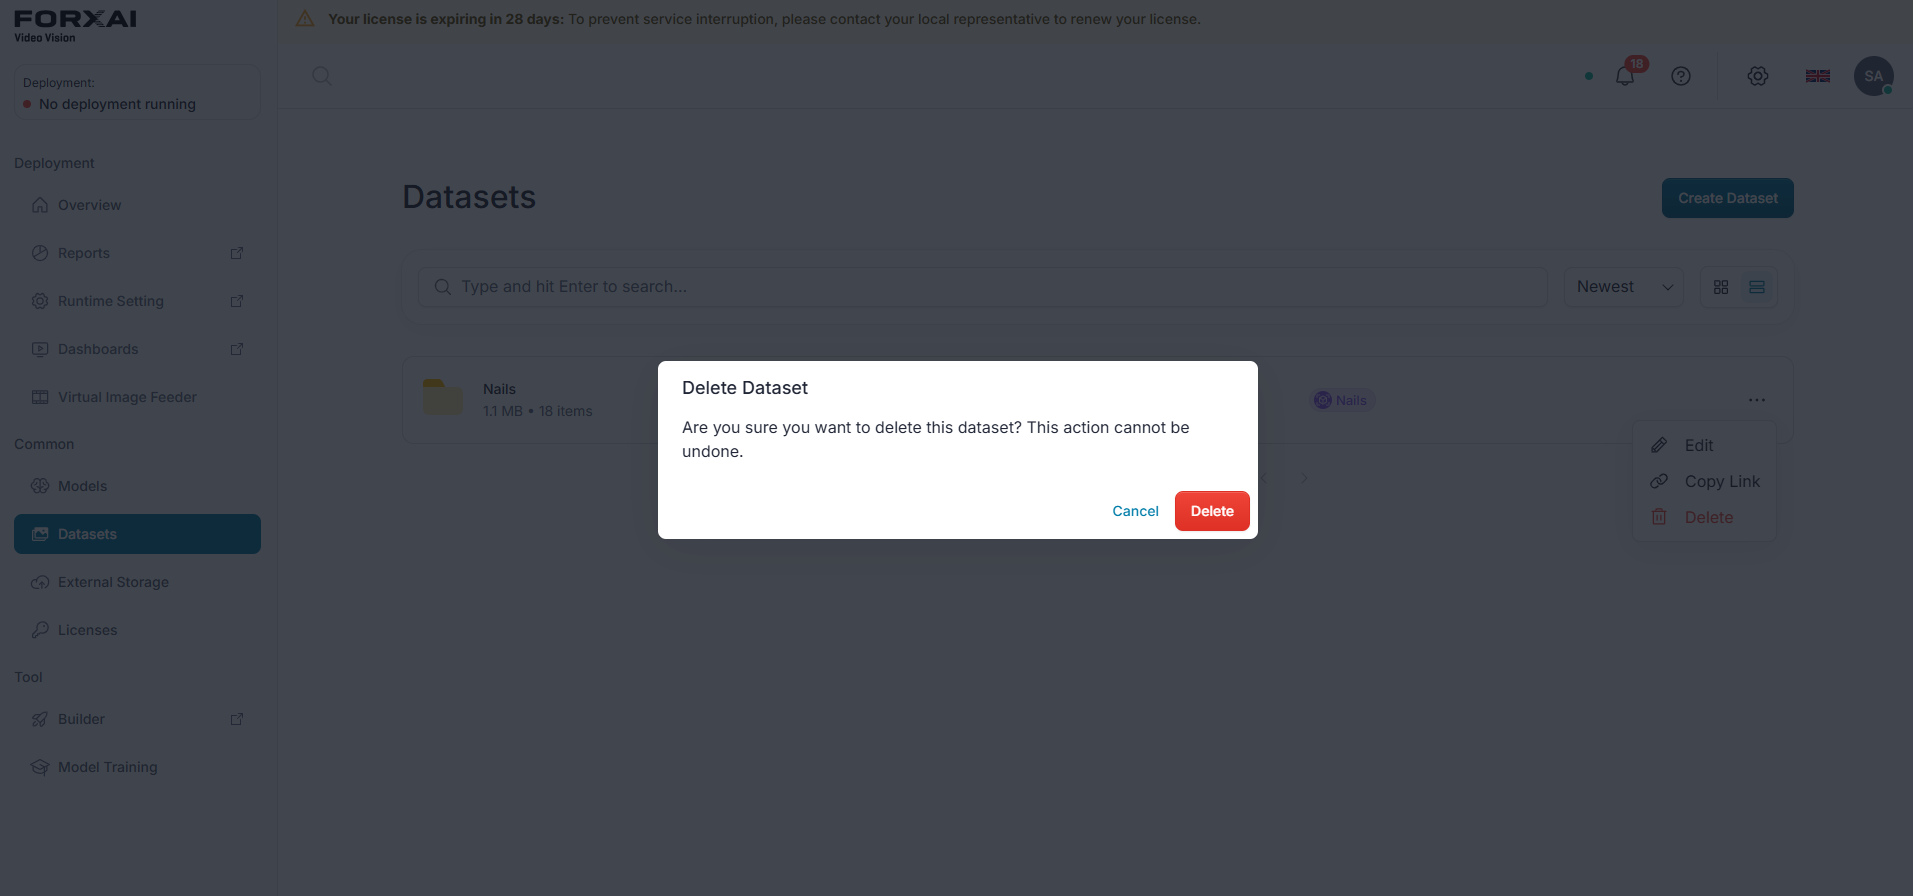
- Follow the same steps as above. A confirmation dialog will appear, requiring you to confirm the deletion.
⚠️ This action cannot be undone. Ensure you no longer need the dataset before proceeding.
⚠️ If the dataset is used by any active virtual camera, it cannot be deleted and images within the dataset cannot be modified.
💡 Tip
Dataset is deleted in the background. This may take up to several minutes (based on the dataset size). While this period, the dataset is still visible in the list of datasets, and the user cannot create a same-named dataset.
Uploading Images
This section describes how to add images to dataset. You can upload images (single ones or in ZIP file) to created dataset. To upload images to a dataset follow these steps:
- Navigate to the dataset detail page.
- Click the Upload button.
- Choose the zip file or individual image you want to upload, or simply drag and drop it into the upload area.
💡 Tip
Supported file types are JPEG, JPG, ZIP. In case that ZIP contains unsupported files they will be skipped. Currently we support uploading up to 8K images.
💡 Tip
The platform gives user an option to replace or skip same-named images in the dataset. If user decides to replace the images, the platform notifies the user regarding the possible linked annotations. 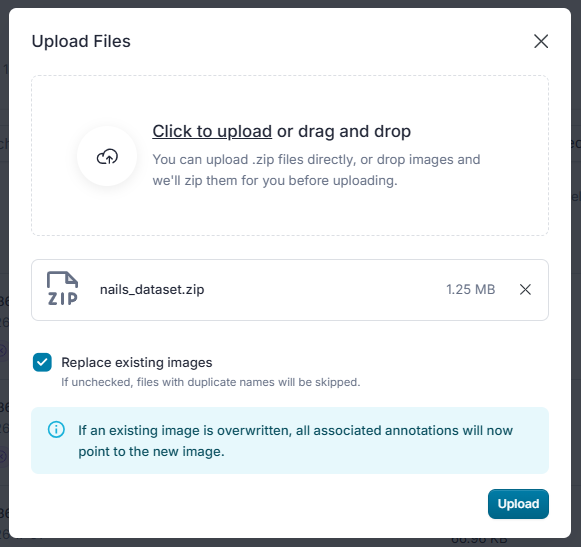
- Click Upload to confirm.
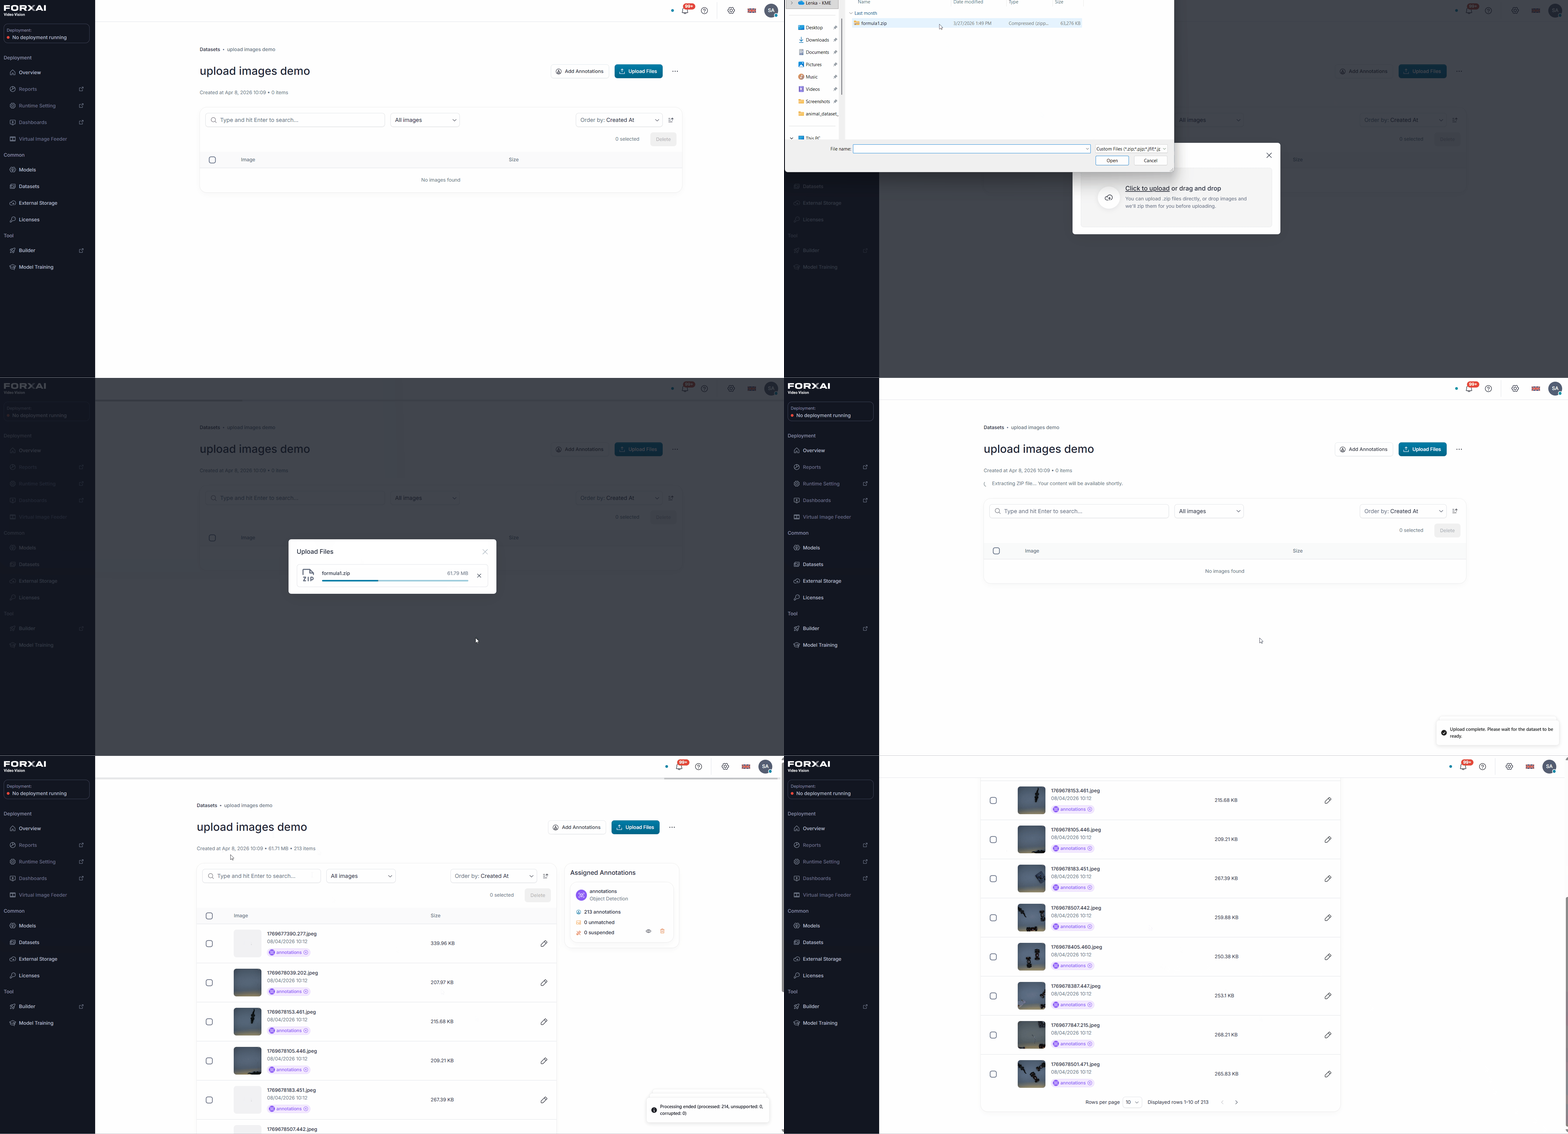
⚠️ Platform iterates over all files and subfolders in the archive and imports only the valid images.
In case a ZIP file contains also unsupported images they are skipped and not uploaded (marked as unsupported). 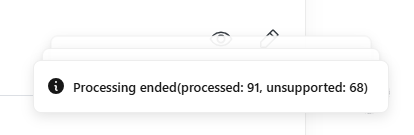
- User is informed when the upload of files is done. After uploading the ZIP file, the system will automatically extract the images and add them to the dataset. After successful upload, images are shown in dataset detail.
Uploading Annotations
This section describes how to add and connect image annotations to the dataset.
💡
The platform supports annotations in CVAT XML format version 1.1 exported from task only. Use Export task dataset on the CVAT for XML export.
Navigate to the dataset detail page.
Click the Add Annotations button.

Choose a unique annotation name, choose an annotation type, and link an annotation file.
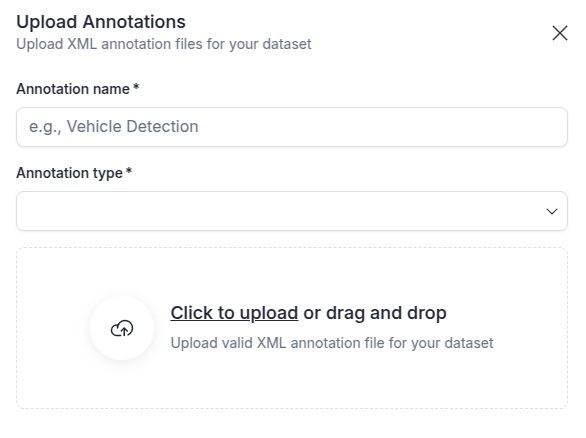
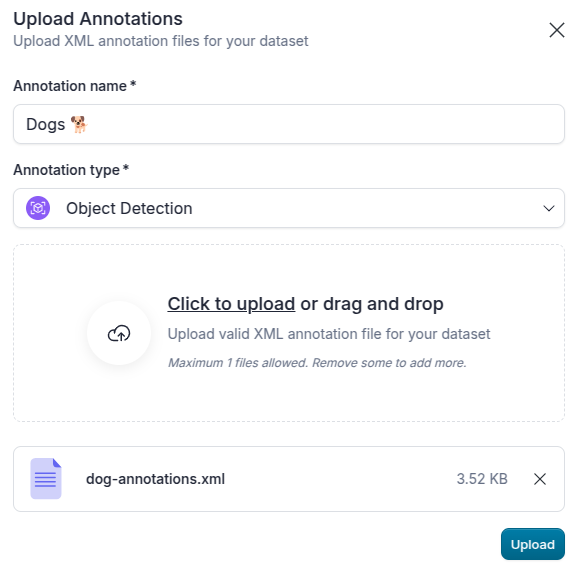
Upload the annotation file
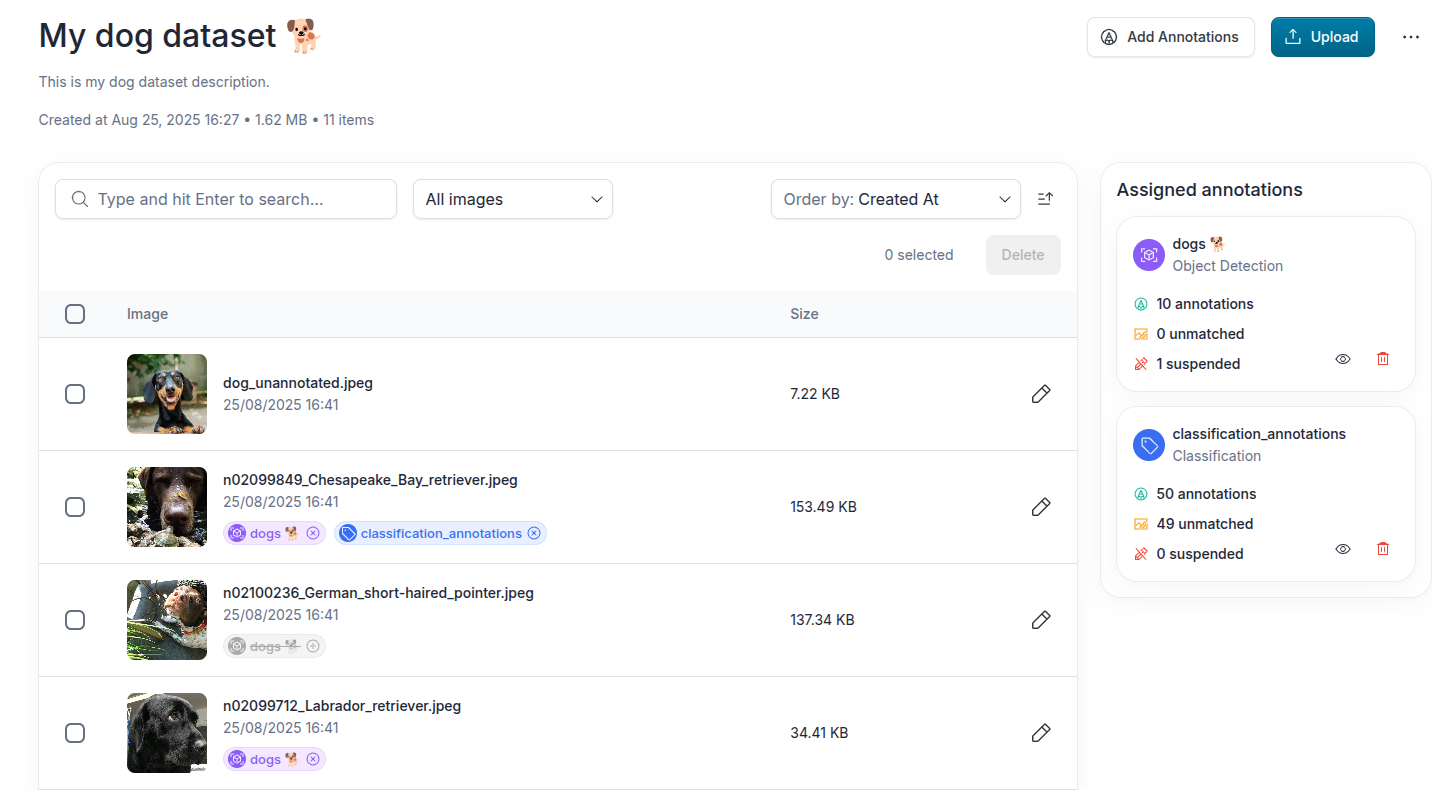
Linked annotations are automatically added to the dataset and shown on the right part of the dataset detail screen, and the annotation records are automatically linked to the images in the dataset with matching filename.
Images Management
This section outlines how to manage individual images within a dataset. You can view, add, rename, replace, or delete images directly from the dataset detail page.
Viewing Images
All uploaded images are displayed in a list on the dataset detail page, allowing you to review the dataset's contents.
Adding or Replacing an Image
- Add a New Image: To add a new single image, follow the same steps as described in the Uploading Images section.
Renaming an Image
Rename an Image: To rename an image in the dataset:
- Click the Pencil icon on the selected item row.
- Enter the new name and confirm the change.
⚠️ Names of all images in a dataset must be unique.
💡 Tip
The renaming includes a checkbox for updating linked annotations. If checked, the linked annotations will change image filenames to the new name. 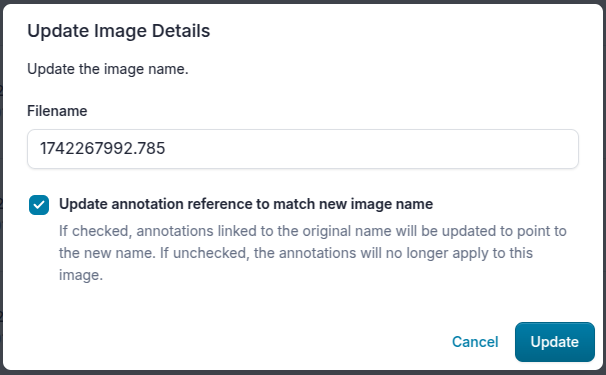
Deleting Images
⚠️ Images cannot be deleted nor renamed while the dataset is used by any active virtual camera.
💡 Tip
If you want to delete all images in dataset, it is easier to delete the dataset itself. If this is your case, please follow Deleting Datasets section.
To delete one or more selected images from the dataset:
- Select the images you want to remove by clicking the checkboxes next to each image.
- Click the Delete button located in the table header.
⚠️ This action cannot be undone. Ensure you no longer need the selected images before proceeding.
Annotation Management
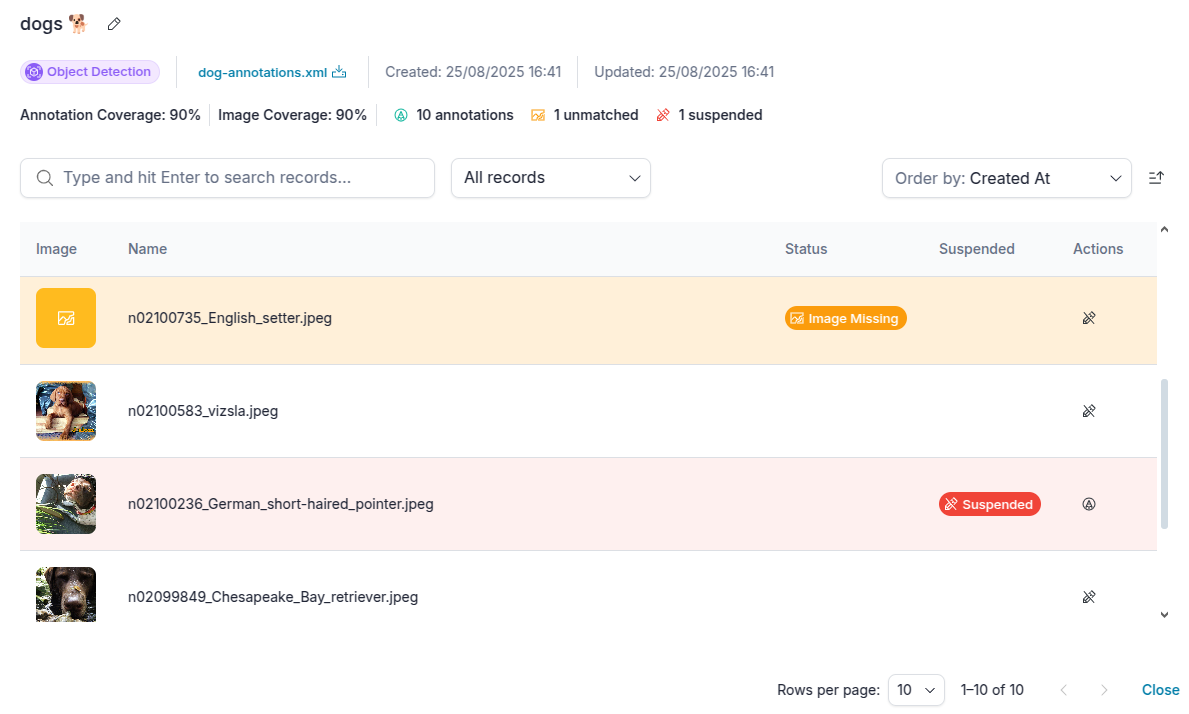
Platform allows user to see and manage imported annotations within the dataset screen. On the dataset detail page, user can see all imported annotations and their status. User can also see which images are linked to the annotation.
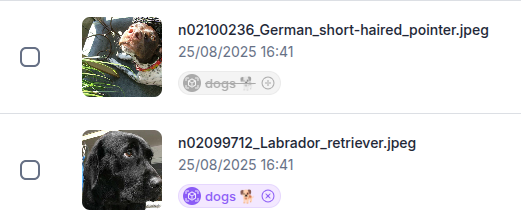
The user is able to suspend and recover each annotation per image on the dataset detail screen.
💡 Tip
Suspension temporarily remove selected annotations from the working annotation set without modifying the original source annotation file. This is reversible action which allows user to unlink the annotation from the image.
💡 Tip
In case of renaming the image with the "keep annotations" option set, the suspended annotations are also updated.
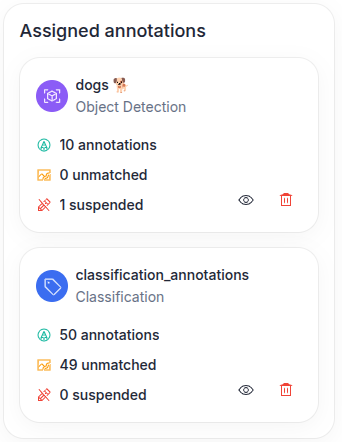
On the right site of the screen, user can see the list of assigned annotations to the given dataset. The list shows all annotations that are linked to the dataset with basic information such as:
- Name
- Annotation type
- Number of annotations within the file
- Number of annotations without image within the dataset
- Number of suspended annotations
User is also able to delete the annotation file or see the detail of the annotation.
Annotation detail page
Upon clicking on the annotation view icon, the overlay appears with the annotation detail page. The detail page works as a viewer for the annotation file. User can search for annotation by image filename, filter the annotations by suspended status, see (un)linked annotations, or see the coverage statistics.
User can also suspend the annotation for given image or download the original (unchanged) annotation file.